Why Free SSL on CloudFlare?
Securing your website with HTTPS protects user data and improves search engine rankings. Cloudflare offers a free SSL/TLS solution that can provide long-term encryption, up to 15 years, without frequent renewals. At the time, I was struggling to install an SSL for my website, and my domain name provider ordered me to pay $7 to secure my site. However, I didn’t want to pay more dollars as I know that CloudFlare is the best choice for every blogger. Therefore, I decided to log in CloudFlare account and change my domain nameservers.
In this blog post, I will walk you through the process of installing a free, long-lasting SSL certificate using Cloudflare and following my simple steps.
1- Create an Account on CloudFlare For Free
Firstly, you should create an account on CloudFlare. There is no affiliate link to go through; just open a new browser, type cloudflare.com, and here you go. The first page will look like the example below. Ensure that you click on “Start for free.”

2- Add your Domain Name on CloudFlare
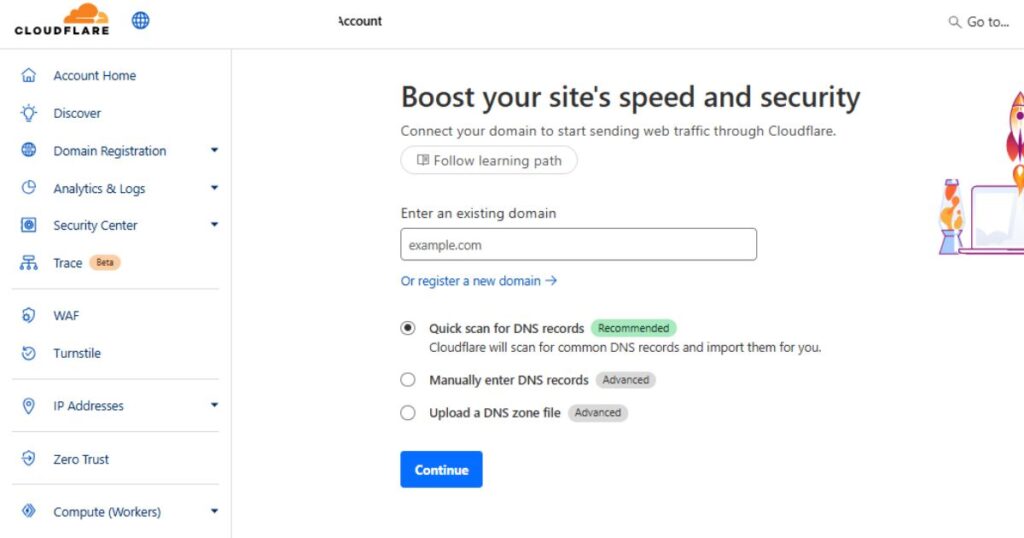
Secondly, after registering, it’s time to enter your domain name to get a lifetime SSL. On the first page of CloudFlare or your dashboard, you will find a button where you can add your existing domain name, so enter it and click on “continue“. Check the image below.
3- Select the Free Plan on CloudFlare
Thirdly, after adding your existing domain name, you will find 2 plans: the $0 free plan or the Pro plan for $20 monthly. Of course, you are going to select the free plan to continue the Free SSL activation.
4- Update your Nameservers to Activate CloudFlare
Fourthly, this is the last step to install SSL on CloudFlare. After that, CloudFlare will be allowed to speed up and protect your website. To update your nameservers;
- Log in to your DNS provider (most likely your registrar). For example, if your existing domain is on Namecheap, open your dashboard and select “Domain List.” After that, change the nameservers to “Custom DNS”, then add the new nameservers like this one: (jake.ns.cloudflare.com). Finally, click on “save”, and return to CloudFlare and click on “continue”.
Ensure that the DNS server update may take up to 48 hours to take effect. But, for my situation, it took me only several minutes, and my website became positively secured.
Now, I’m enjoying the lifetime free SSL, and I want you to do the same simple steps. For more explanation, I captured a video explaining how to install the free SSL certificate on CloudFlare.
✅ Final Thoughts on Free SSL
By following these steps, you’ve secured your website with a free SSL certificate from Cloudflare that can last up to 15 years. This not only enhances your site’s security but also improves performance and SEO. Cloudflare’s automatic renewal and easy management make it a convenient choice for long-term SSL encryption.
🎯 Check my latest blog post: How to Create a Custom Ad Blocker Message for Your Website Using Google AdSense (No Plugin Needed)